Black & Decker Coffee Maker Instructions: A Comprehensive Guide
Black & Decker coffeemakers offer diverse models like CM0915BKD-FD, DCM100B, and CM2035SM, requiring careful setup and operation for optimal brewing performance.
Black & Decker has a long-standing reputation for producing reliable and affordable home appliances, and their coffee makers are no exception. These machines cater to a wide range of coffee-drinking preferences, from basic drip models to programmable options with advanced features.
Understanding your specific Black & Decker model is crucial for optimal use. Popular series include the CM0915BKD-FD, known for its simplicity, the DCM100B, a programmable 12-cup coffeemaker, and the CM2035SM thermal programmable model. Each offers unique benefits.
Before your first brew, always consult the included Use and Care book for model-specific instructions and safety precautions. Proper care and maintenance, including regular cleaning and descaling, will ensure years of flavorful coffee enjoyment. Support is readily available through the manual’s listed number.
Understanding Different Models (CM0915BKD-FD, DCM100B, CM2035SM)
Black & Decker offers a variety of coffee makers to suit different needs. The CM0915BKD-FD is a straightforward 12-cup coffeemaker, ideal for those seeking simplicity. The DCM100B steps up with programmable features, allowing for delayed brewing and customized schedules. It’s a 12-cup model, offering convenience for larger households.
The CM2035SM distinguishes itself as a thermal programmable 12-cup coffee maker, maintaining coffee temperature for extended periods without a hot plate. This model prioritizes flavor preservation. Each model’s Use and Care book details specific functions.
While designs may vary slightly, core features like water reservoirs and filter baskets remain consistent. Always refer to your model’s manual for accurate parts identification and operation instructions. Diagrams are often available in the original PDF version.
Setting Up Your Coffee Maker
Before first use, thoroughly clean your Black & Decker coffeemaker to remove any manufacturing residue and ensure optimal brewing quality.
Initial Cleaning Before First Use
Before brewing your first pot, a thorough cleaning cycle is essential for all Black & Decker coffee makers. Fill the water reservoir to its maximum capacity with fresh, clean water. Do not add coffee grounds during this process. Place the carafe securely on the warming plate. Initiate a full brewing cycle as if you were making coffee – this will flush out any residual manufacturing materials or dust that may be present within the system.
After the cycle completes, carefully discard the water from the carafe. Repeat this process at least two to three times to ensure a completely clean machine. This initial cleaning helps guarantee the purest coffee flavor and prevents any unwanted tastes from affecting your first brew. Save these instructions for future reference!
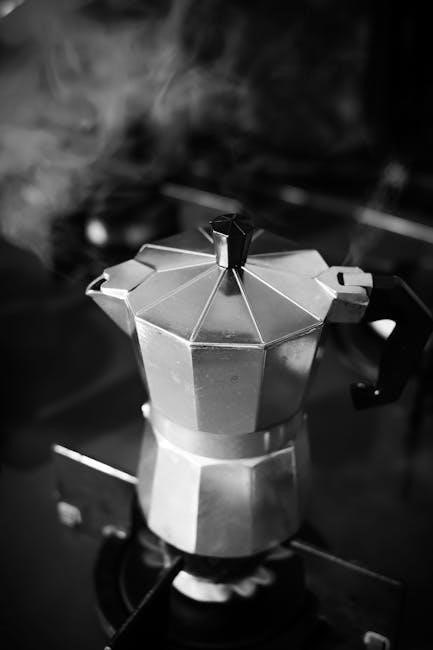
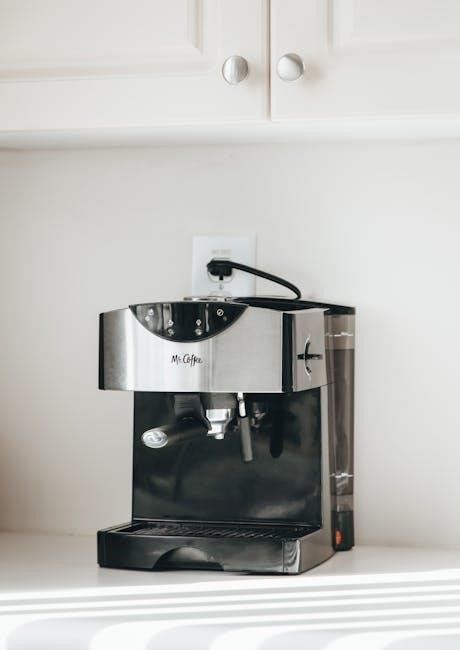
Parts Identification: Getting to Know Your Coffeemaker
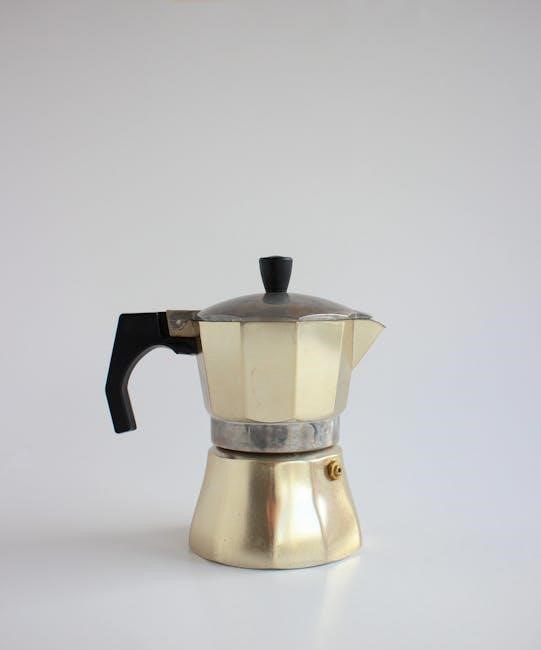
Familiarizing yourself with your Black & Decker coffee maker’s components is crucial for proper use. Key parts include the water reservoir, typically located at the back or side, for holding brewing water. The filter basket, often removable, holds the coffee filter and grounds. The carafe, usually glass or thermal, collects the brewed coffee.
The control panel features buttons for power, programming, and brew strength (on applicable models). A warming plate keeps brewed coffee warm. Some models include a removable drip tray to catch spills. Understanding each part’s function ensures efficient operation and simplifies cleaning. Refer to your specific model’s diagram in the use and care guide for precise locations.
Control Panel Overview: Functions and Buttons
The control panel is your interface for operating your Black & Decker coffee maker. The Power button initiates and terminates the brewing process. Programming buttons (Model dependent) allow setting the clock and auto-brew function. Look for Brew Strength options – if available – to select regular or bold coffee.
An Auto-Brew button activates the programmed brewing cycle; Some models feature a Clock button for time setting. The display shows the current time or programmed brew time. Understanding these functions allows you to customize your coffee brewing experience. Consult your model’s manual for specific button layouts and functionalities.
Brewing Coffee: Basic Operation
To brew, add fresh water and ground coffee to their respective compartments, select your desired brew strength, and initiate the brewing cycle with a single press.
Adding Water and Coffee Grounds
Begin by filling the water reservoir with the desired amount of fresh, cold water, using the water level indicator as a guide – typically measured in cups. Ensure you don’t exceed the maximum fill line.
Next, insert a paper filter into the filter basket. Add ground coffee, generally one to two tablespoons per cup, adjusting to your preferred strength.
For optimal flavor, use a medium grind. Close the filter basket securely. Proper water and coffee ratios are crucial for a balanced brew. Always check your specific model’s instructions, as capacity and recommendations may vary slightly.
Finally, ensure the carafe is correctly positioned on the warming plate before starting the brewing process.
Selecting Brew Strength (If Applicable)
Certain Black & Decker coffee maker models offer adjustable brew strength settings, allowing you to customize your coffee’s flavor profile. This feature is typically controlled via a dedicated “Brew Strength” button on the control panel.
Options commonly include “Regular” for a balanced flavor, and “Bold” or “Strong” for a richer, more intense taste. If your model has this function, press the button to cycle through the available settings until your desired strength is displayed.
Remember that stronger settings may require slightly more coffee grounds for optimal results. Refer to your specific model’s user manual for detailed guidance on brew strength adjustments and recommended coffee-to-water ratios.
Starting the Brewing Cycle
Once the water reservoir is filled and coffee grounds are in place, initiating the brewing cycle is straightforward. Locate the “Brew” or “Start” button on your Black & Decker coffee maker’s control panel. Pressing this button activates the heating element and begins the brewing process;
The coffee maker will automatically begin dispensing hot water over the coffee grounds, dripping brewed coffee into the carafe below. Avoid interrupting the brewing cycle once it has started, as this could affect the final brew quality.
Most models feature an indicator light that illuminates during brewing and turns off once the cycle is complete. Allow the coffee maker to finish brewing fully before enjoying your fresh cup!
Programming Your Coffee Maker
Black & Decker coffee makers allow setting the clock and utilizing the auto-brew function for convenient, scheduled brewing, enhancing your morning routine effortlessly.
Setting the Clock
Accurate time setting is crucial for utilizing the programmable features of your Black & Decker coffee maker. Begin by locating the “Hour” and “Minute” buttons on the control panel. Press and hold the “Hour” button until the correct hour appears on the display. Repeat this process with the “Minute” button to set the desired minutes.
Some models may have an “AM/PM” button; ensure the correct time of day is selected. Confirm your settings by releasing the buttons and allowing the clock to stabilize. Refer to your specific model’s use and care guide (CM0915BKD-FD, DCM100B, or CM2035SM) for detailed instructions, as button layouts can vary. A properly set clock ensures the auto-brew function activates at your preferred time, delivering fresh coffee when you want it.
Programming Auto-Brew Function
To enjoy coffee automatically, first ensure the clock is correctly set. Locate the “Program” or “Auto” button on your Black & Decker coffeemaker’s control panel. Press this button; the display will likely indicate “Program” or flash the current time. Use the “Hour” and “Minute” buttons to set the desired brew start time.
Confirm your selection, often by pressing the “Program” button again. Some models require you to also select a brew strength. Ensure the coffee maker is loaded with water and grounds before programming. Refer to your model’s manual (CM0915BKD-FD, DCM100B, CM2035SM) for specific steps, as procedures differ. The auto-brew indicator light will illuminate, confirming the function is active.
Adjusting Auto-Brew Time
Need to change your programmed brew time? Begin by deactivating the current auto-brew setting. This is typically done by pressing the “Program” or “Auto” button until the auto-brew indicator light turns off. Then, re-enter the programming mode as described previously – pressing “Program” and using the “Hour” and “Minute” buttons to input the new desired start time.
Double-check your settings before confirming. Remember that the time is when brewing will begin, not when it will finish. For models like CM0915BKD-FD or DCM100B, consult the manual for precise button sequences. Always ensure sufficient water and grounds are present for the adjusted auto-brew cycle.
Safety Precautions
Always follow basic safety guidelines when using your Black & Decker coffeemaker to reduce fire, shock, or injury risks, and save these instructions!
Important Safeguards to Follow
Before operating your Black & Decker coffee maker, thoroughly read all instructions. This appliance is designed for household use only; avoid commercial applications. Ensure the voltage of your outlet matches the appliance’s specifications. Never immerse the appliance, cord, or plug in water or other liquids.
Close supervision is necessary when the appliance is used near children. Avoid operating the coffeemaker with a damaged cord or plug. Do not operate an appliance with a damaged cord or plug, or after the appliance malfunctions. Always unplug from the outlet when not in use and before cleaning. Allow the appliance to cool before cleaning. Avoid touching hot surfaces.
Be cautious when handling hot liquids. Always operate on a stable, heat-resistant surface. Strong light should be off during operation. Save these instructions for future reference.
Electrical Safety Guidelines
To reduce the risk of electrical shock, never operate the Black & Decker coffee maker with a damaged cord or plug. If the appliance malfunctions or shows signs of damage, discontinue use immediately. Do not attempt to repair the appliance yourself; seek professional assistance.
Always unplug the coffee maker from the outlet when not in use, before cleaning, and if any issues arise. Avoid using extension cords; plug directly into a grounded outlet. Ensure your hands are dry before handling the plug or appliance. Never pull the cord to disconnect from the outlet; grasp the plug instead.
Keep the cord away from hot surfaces and sharp edges. Do not operate the appliance outdoors or in damp environments. Regularly inspect the cord for any signs of damage. A qualified technician should replace a damaged cord.
Avoiding Potential Hazards
Be cautious when handling hot surfaces, like the carafe and warming plate, as they can cause burns. Always use the handle when pouring coffee. Avoid touching hot components during or immediately after brewing. Keep the coffee maker out of reach of children.
Never immerse the appliance, cord, or plug in water or other liquids. Do not operate the coffee maker if it’s empty, as this could cause damage. Ensure the carafe is properly positioned on the warming plate before starting the brewing cycle.
Do not use abrasive cleaners or scouring pads, as they can damage the appliance. Regularly inspect the coffee maker for any signs of wear or damage. A strong light being off is a safety precaution. Always clean thoroughly before first use.
Cleaning and Maintenance
Regular cleaning, including descaling, is crucial for optimal performance and longevity of your Black & Decker coffeemaker; clean removable parts frequently.
Regular Cleaning Schedule
To maintain your Black & Decker coffee maker’s performance, establish a consistent cleaning routine. After each use, thoroughly rinse the carafe, filter basket, and any removable parts with warm, soapy water. These components should be washed daily to prevent coffee residue buildup.
Weekly, wipe down the exterior of the coffee maker with a damp cloth. Pay attention to areas prone to spills or drips. Monthly, a more thorough cleaning is recommended. This includes running a full brewing cycle with just water to help flush out any internal buildup.
Crucially, descaling should be performed every 3-6 months, depending on water hardness, to remove mineral deposits that can affect brewing quality and machine lifespan. Consistent cleaning ensures flavorful coffee and extends the life of your appliance.
Descaling Your Coffee Maker
Descaling removes mineral buildup from your Black & Decker coffee maker, crucial for optimal performance. Fill the water reservoir with a mixture of equal parts white vinegar and water. For heavier buildup, increase the vinegar ratio.
Run a full brewing cycle without coffee grounds. Once complete, discard the vinegar solution and run two to three cycles with fresh water only to rinse thoroughly. This eliminates any lingering vinegar taste or odor.
Repeat the process if mineral deposits persist. Regular descaling – every 3-6 months, depending on water hardness – prevents scaling, ensuring consistent brewing temperature and extending the lifespan of your coffee maker. Ignoring descaling can lead to reduced efficiency and potential damage.
Cleaning Removable Parts
Regularly cleaning removable parts ensures fresh-tasting coffee and hygiene. After each use, wash the carafe, filter basket, and any other detachable components with warm, soapy water. Avoid abrasive cleaners, as they can damage surfaces.
For stubborn stains in the carafe, a paste of baking soda and water can be effective. Rinse all parts thoroughly with clean water, ensuring no soap residue remains. The filter basket is often dishwasher safe – check your model’s manual for confirmation.
Allow all parts to air dry completely before reassembling. Inspect for any lingering coffee grounds or residue. Consistent cleaning prevents buildup and maintains the quality of your brewed coffee, prolonging the life of your Black & Decker coffeemaker.
Troubleshooting Common Issues
Common problems include the coffee maker not turning on, slow brewing, or poor coffee taste; solutions often involve checking power and cleaning thoroughly.
Coffee Maker Not Turning On
If your Black & Decker coffee maker fails to power on, begin by verifying the power cord is securely plugged into a functioning electrical outlet. Test the outlet with another appliance to confirm it’s delivering power.
Next, check the coffee maker’s internal fuse or circuit breaker, if accessible, as a blown fuse can prevent operation. Ensure the unit is properly assembled; some models have safety mechanisms preventing operation if components aren’t correctly in place.
Review the user manual for specific troubleshooting steps related to your model (CM0915BKD-FD, DCM100B, CM2035SM). If the issue persists, contact Black & Decker support for assistance, referencing your model number for accurate guidance. Do not attempt to disassemble the unit yourself.
Coffee Brewing Too Slowly
If your Black & Decker coffee maker is brewing exceptionally slowly, the most common cause is mineral buildup. Scale accumulation restricts water flow, hindering the brewing process. Descaling your coffee maker regularly – using a descaling solution or a vinegar-water mixture – is crucial.
Also, ensure the water reservoir isn’t overfilled, and the filter basket isn’t clogged with coffee grounds. Using too fine a grind can also slow down brewing; Check for any obstructions in the spray head or water inlet.
Refer to your model’s (CM0915BKD-FD, DCM100B, CM2035SM) manual for specific descaling instructions and cleaning recommendations. Consistent maintenance prevents slow brewing and ensures optimal coffee flavor.
Coffee Taste Issues
Experiencing unsatisfactory coffee flavor from your Black & Decker coffeemaker? Several factors could be at play. Stale coffee grounds are a primary culprit; always use fresh grounds for the best taste. Mineral buildup impacts flavor, so regular descaling (using vinegar or a descaling solution) is vital.
Ensure thorough cleaning of all removable parts – the carafe, filter basket, and water reservoir – after each use. A dirty coffeemaker imparts unwanted flavors. The coffee-to-water ratio also matters; adjust to your preference.
Consider the type of filter used; paper filters can sometimes affect taste. Refer to your model’s manual (CM0915BKD-FD, DCM100B, CM2035SM) for specific cleaning and brewing recommendations.
Advanced Features (Model Dependent)
Certain Black & Decker models boast thermal carafes, programmable settings, and even single-serve options, enhancing convenience and customization for your brewing experience.
Thermal Carafe Benefits
Black & Decker coffee makers equipped with thermal carafes offer significant advantages over glass carafes. These double-walled, vacuum-sealed carafes excel at maintaining coffee temperature for extended periods – often hours – without the need for a warming plate.
This preservation of temperature not only enhances the coffee’s flavor profile, preventing it from becoming bitter or burnt, but also contributes to energy savings by eliminating continuous heating.
Thermal carafes are also more durable and less prone to breakage compared to their glass counterparts, offering increased safety and longevity. They are a premium feature designed for coffee enthusiasts who prioritize both quality and convenience, ensuring a consistently enjoyable brewing experience.
Programmable Features Explained
Black & Decker programmable coffee makers simplify your morning routine. The auto-brew function allows you to set a specific time for your coffee to begin brewing automatically, ensuring a fresh pot is ready when you wake up. Setting the clock accurately is the first step, typically using dedicated hour and minute buttons on the control panel.
Adjusting the auto-brew time involves selecting your desired brew start time. Some models offer programmable brew strength, letting you customize the coffee’s intensity. These features enhance convenience and allow for personalized coffee preparation, eliminating the need for manual operation each morning.
Single-Serve Options (If Applicable)
Certain Black & Decker models offer single-serve brewing capabilities, providing flexibility for individual coffee preferences. These systems typically utilize compatible coffee pods or grounds placed in a designated filter basket. The process involves filling the water reservoir, inserting the pod or grounds, and selecting the single-serve brew option on the control panel.
Single-serve functionality allows for quick and convenient brewing of a single cup, minimizing waste and catering to varied tastes within a household. Ensure compatibility with the specific model’s requirements regarding pod type or filter usage for optimal results. This feature adds versatility to your coffee brewing experience.